
How to Create Bubble Chart in Tableau
ntroduction to Bubble Chart in Tableau
In advance to learn about the details of how the bubble chart is plotted in tableau, lets first learn what is bubble chart and when it is the most appropriate time to choose a bubble chart. The name bubble chart itself conveys that when plotted it looks like an assembly of bubbles. A bubble chart can display three or four dimensions of data. Each bubble in the plot represents any member in the dimension field and the size of the bubble represents the value of the measure. We can also add that a Bubble chart is an enhanced version of a scatter plot present in Microsoft Office.
Scatter plot is a type of plot where typically two variables can be visualized and the plot will look like a collection of points, you can use a bubble chart instead of scattering plot if your dataset has three data variables that need to be visualized and the size of bubble in the plot will be determined by the values of the third variable. Let’s see an example to understand the things better, suppose there are around 20 universities in a state and we have the data of the number of people applied to these universities and the number of people who got accepted into these universities for the past 5 years.
With this information, we can calculate the acceptance rate and plot a bubble chart by taking
- the acceptance rate to determine the size of the bubble,
- university name on one axis,
- year on the other one.
As we are done with the introduction of the bubble chart, let’s have a brief discussion about Tableau. Tableau is a data visualization tool that can help produce interactive dashboards that help in a better understanding of the data by using graphs, charts and is primarily focused on helping everyone to make data-driven decisions. The interesting part about tableau is it allows real-time data analytics.
Creating a Bubble Chart in Tableau
So far, we have learned what is bubble chart and what is tableau, now let’s go step by step how to create a bubble chart in Tableau.
1. Open Tableau and you will be able to see the below screen. Connect to a file or server (based on where you input data is present) using the connect option present on the left side of the Tableau landing page

2. Here, in this case, I am using sample data source “Sample – Superstore” present in the tableau and this is how the sample data looks in our case.
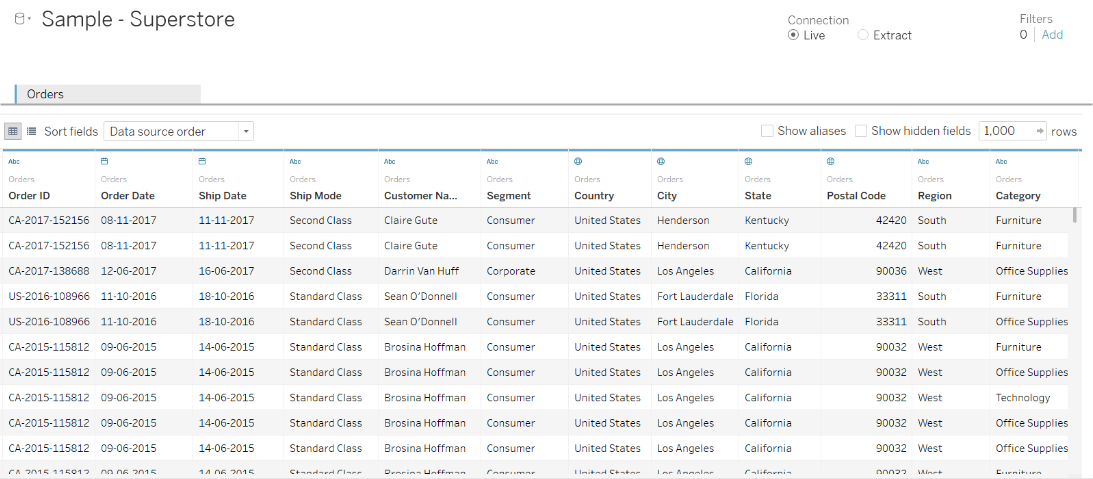
If you see all the columns there are five attributes in the measures division (Discount, Quantity, Profit, Profit ratio, Sales) and there are few attributes in the dimension’s divisions like Product, Location, Order, Customer and these are divided again into the smaller division which provides us with more details.

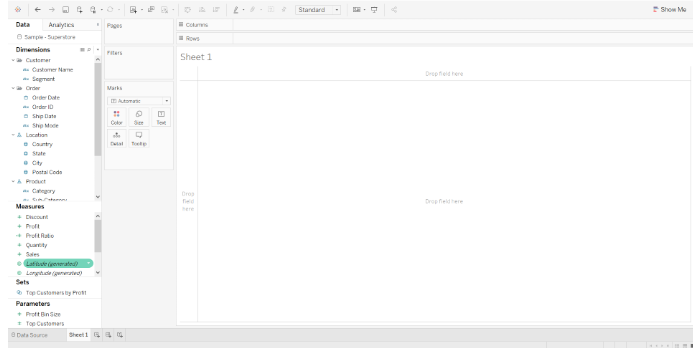
3. Click on the option “Sheet 1” present on the bottom left corner and you will be able to see like the image shown below and this is where you prepare dashboards
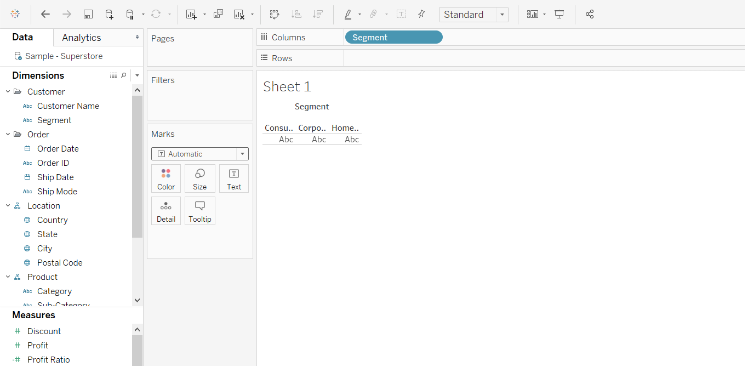
4. Drag the segment into columns, as there are only three types of values in this column in the data source (Consumer, Corporate, Home Office) it will look like the screenshot below this step is done
5. Drag the sales measure into rows, and once it is dragged tableau will automatically sum them categorically and it will look like this once this step is done.
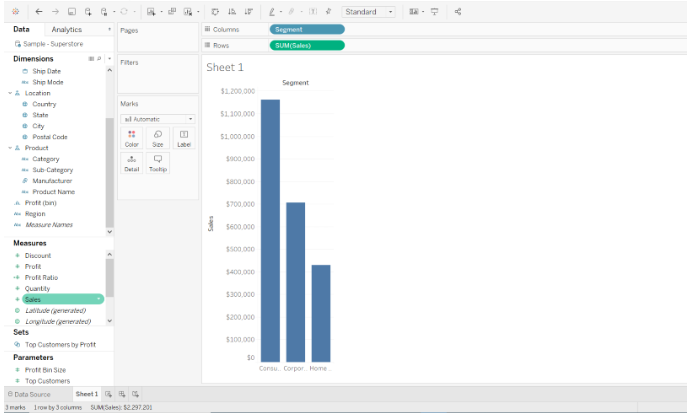
6. The default chart type in Tableau is bar chart when there is a measure on the Rows shelf and dimension on the columns shelf. This is the reason why we are able to see a bar chart here. As we need a bubble chart click on the option “Show me” present on the right top corner and select the bubble chart option in the last.

7. And also to create a bubble chart we need at least 1 or more dimensions and 1 or 2 measures. Here, in this case, we have one dimension (Segment) and one measure (Sales). It will look similar to this when we click on the bubble chart option.
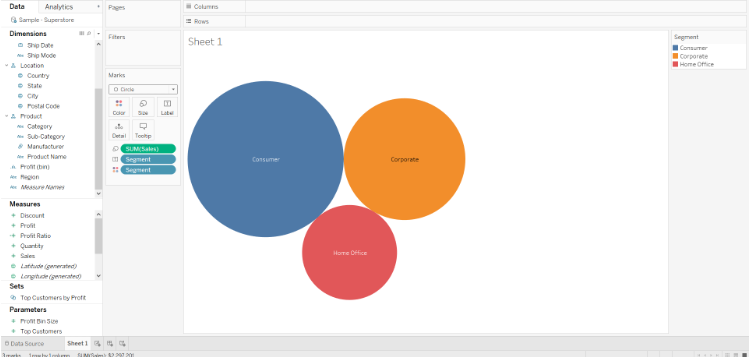
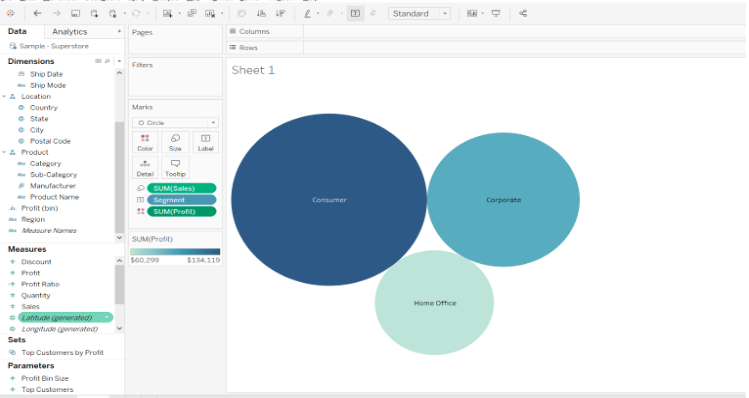
8. To make it more packed and detailed we can drag other dimensions or measures into the features present in marks cards.
9. Here the size of the bubble shows the aggregate of sales for different segments. Drag profit onto the color feature present in measures card and the color of the bubble will represent the aggregate of profit in that specific segment. The same is shown in the below screenshot.
Conclusion
In this way, we can create bubble charts and also play a major role while understanding the social, economic, medical, and other scientific relationships between countries. However, there are a few setbacks that are important to be considered while doing a bubble chart they are
- Bubble charts can become a spot of difficulty to interpret when the magnitude differences in the bubble data elements are large.
- Bubble charts with a large number of triplet data points will tend to have bubbles that overlap and obscure other bubbles, thus restricting the elegance, usefulness, completeness, and accuracy of interpretation of the bubble chart.


Comments
Post a Comment